How to Backup iPhone Notes to PC/Mac
When I get ideas running through me or I have important information to save, I quickly put them all on my iPhone with the help of the iPhone's Notes app anytime or anywhere and later transfer them to my PC for development. But have you ever had problem establishing communication between your iPhone and PC? Have you ever wondered how you can successfully copy or backup your iPhone notes to your PC/Mac? Your answer might be "but with iTunes, iPhone notes can be backup." Yes, it can. But iTunes doesn't allow you to access or read them on your computer. So, how about having a direct connection between your iPhone and your PC or Mac which can not only backup your data but also allows you to read them? Here are the simple steps in getting it done.
BACKUP YOUR iPHONE NOTES TO COMPUTER (WINDOWS AND MAC)
There are many third party software that can be used to backup iPhone data such as notes to PC. Here is my recommendation: iOS recovery. Although, iOS recovery is a data recovery software, it can also backup your data to your preferred location on PC/Mac. It helps to backup iPhone notes on PC or Mac in few clicks.
Follow the following simple steps to backup your iPhone notes and be able to access it.
Step 1: Installation and communication establishment
Download and install iOS recovery on your PC.
For Mac users, you should download the Mac version.
Run the application. Connect your iPhone to your computer using a data USB cable.
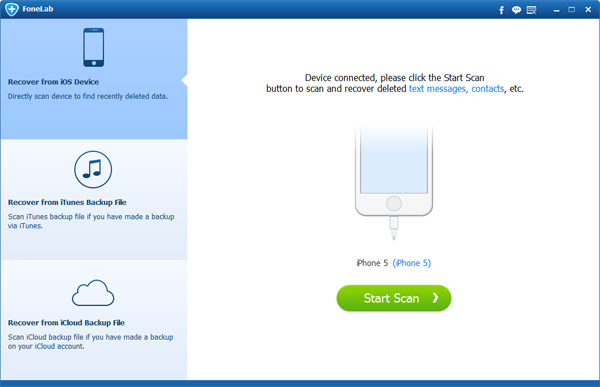
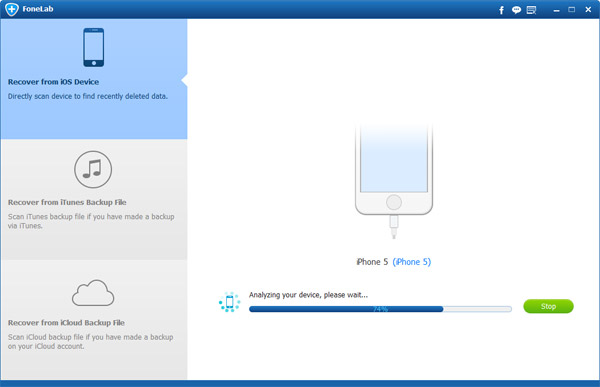
Step 2: Scan your iPhone
Wait for some seconds for your device to be detected. After your device is detected, click Start Scan and the scanning process will start. You don't have to get a bottle of beer as the process is fast – although, this depends more on your PC than the software.
Note: If your device is iPhone 4/3GS, iPad 1 or iPod touch 4, you will need to download a plug-in before entering the scanning mode.
Step 3: Preview your notes and back them up
When the scanning process is complete, all the data on your iPhone will be displayed in categories. Make sure that "Only display the deleted item(s)" on the top of the interface is checked "Off" then click on "Notes". Now click on the "Recover" button to backup your notes on your PC.
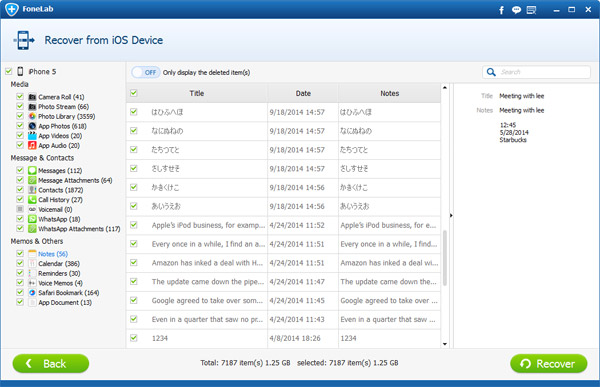
Note: Checking "Only display the deleted item(s)" "On" activate the recovery mode of the application but checking it "Off" activate the backup mode. So make sure it is "Off".
